Air conditioners require regular cleaning in order to function at peak efficiency. The good news, however, is that doing so does not need to be as tedious as perceived to be. With a few simple DIY aircon cleaning steps, you will be able to keep your unit in top shape and ensure that it continues to be an efficient cooling solution for your home in the Singaporean heat. Let’s take a closer look at these steps.
Safety First: Preparing for DIY Cleaning
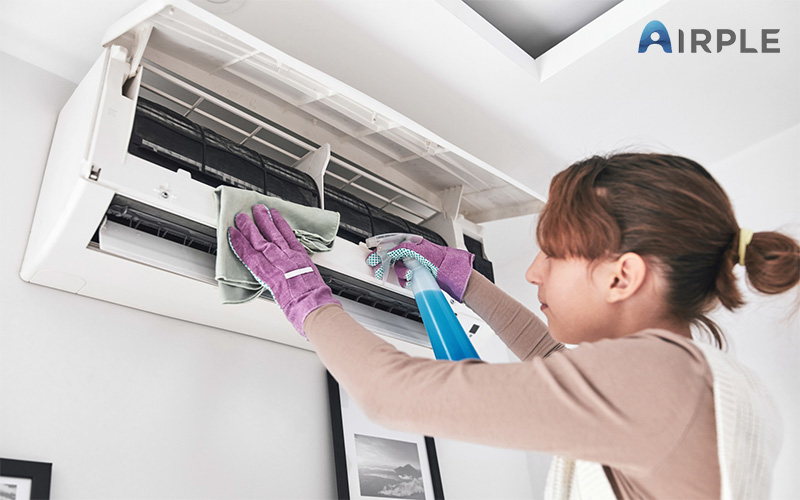
Before diving into DIY aircon cleaning, it is vital to prioritise safety. Start by turning off the power to your unit at the circuit breaker to eliminate any risk of electrical accidents. Wear protective gloves and goggles to safeguard yourself from dust and cleaning chemicals. If your unit is installed on an external wall, take extra precautions while accessing the aircon ledge. A stable ladder and a harness may even be necessary for safe cleaning.
Preparing your tools in advance will also help streamline the process. You will need a soft brush, a vacuum cleaner, a mild detergent, a spray bottle, and a clean cloth. Taking these steps ensures safety and efficiency. That being said, we do not necessarily recommend any step that requires you to place yourself in any sort of risk of falling off the ledge. Instead, seek professional aircon ledge cleaning services that will be conducted by experts who are trained for these risky moves.
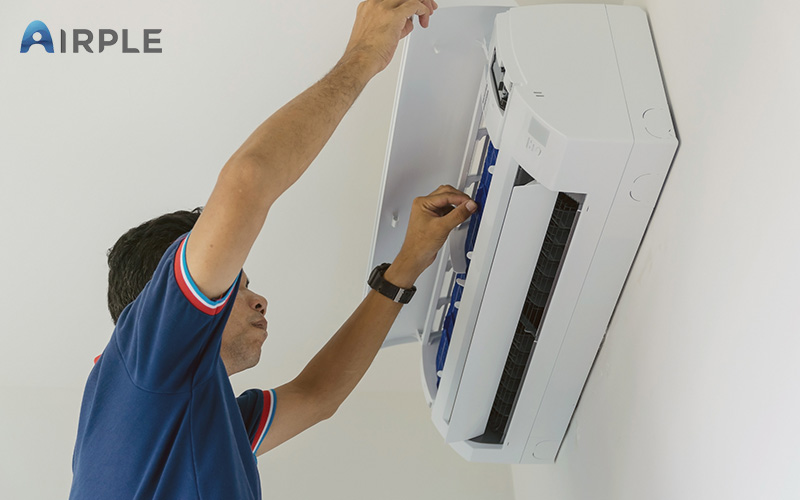
Cleaning the Air Filter
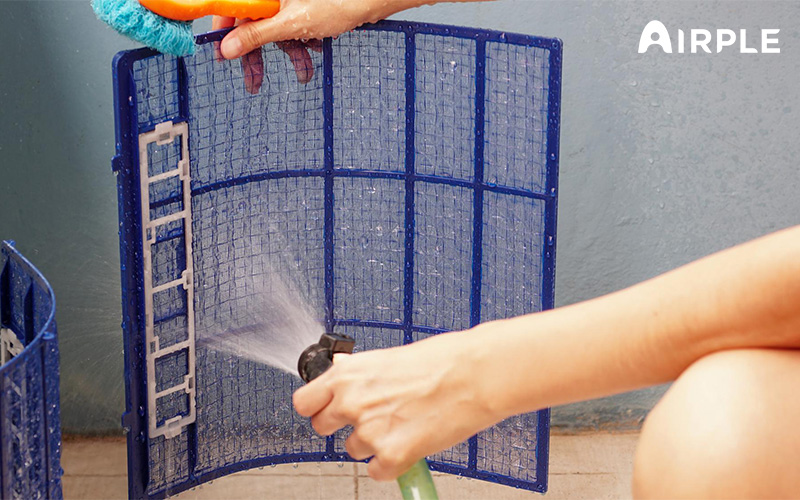
One of the most critical aspects of DIY aircon cleaning is tending to the air filter. A dirty filter can impede airflow, reduce efficiency, and compromise indoor air quality.
1. Remove the Filter:
Open the air conditioning unit's front panel to access the air filter. Slide it out gently to avoid spilling dust and debris
2. Clean the Filter:
If the filter is reusable, rinse it under lukewarm water to remove dust. Use a soft brush and a mild detergent for deeper cleaning. Allow the filter to dry completely before reinserting it.
3. Replace if Necessary:
If the filter is damaged or beyond cleaning, consider replacing it with a new one. You can easily find air conditioner repair parts online or at local aircon stores.
Regularly cleaning or replacing the filter every one to three months is an essential part of DIY aircon maintenance.
Learn More: Top 5 Reasons Why Regular Aircon Cleaning Is Imperative
Coil Cleaning Techniques
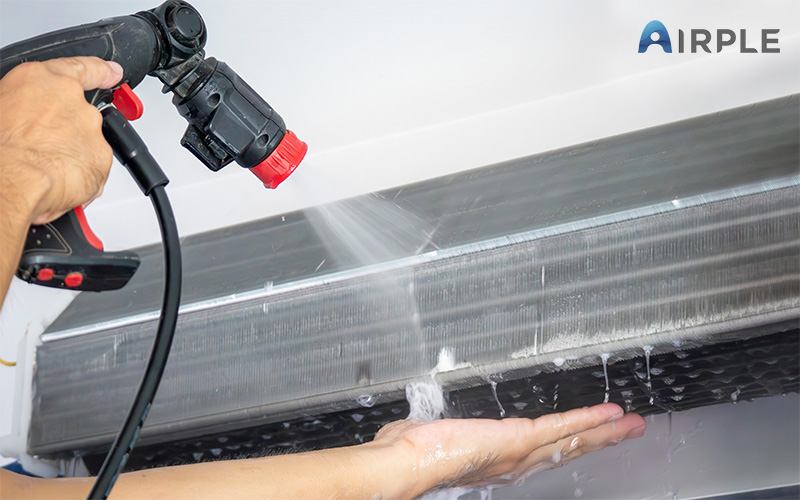
The evaporator and condenser coils play a crucial role in heat exchange, making their maintenance a key component of home air conditioning care. Dust and grime can accumulate on these coils, reducing their efficiency and causing overheating.
1. Access the Coils:
Remove the protective panels to expose the evaporator (indoor unit) and condenser (outdoor unit) coils.
2. Brush and Vacuum:
Use a soft brush to loosen debris, then vacuum the coils carefully to remove dirt. Avoid damaging the delicate fins.
3. Apply a Cleaning Solution:
Spray a specialised coil cleaner or a homemade mixture of water and vinegar onto the coils. Let it sit for 10-15 minutes before gently rinsing with water.
4. Straighten Bent Fins:
Use a fin comb to straighten any bent fins for optimal airflow.
Clean coils improve cooling efficiency and reduce energy consumption, which in the long run translates to savings from your utility bills.
Drain Line Maintenance
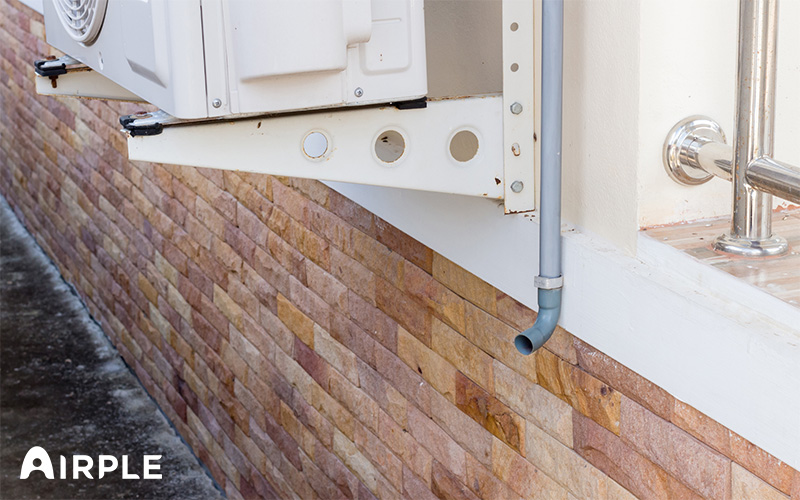
Leaks are one of the most common air conditioner issues, mainly caused by clogged drain lines. These leaks could lead to mould growth if left unresolved, affecting both your unit's efficiency and your home's air quality. This is why proper maintenance of the drain line is absolutely essential in DIY aircon cleaning.
1. Locate the Drain Line:
Find the PVC pipe near the indoor unit that carries condensation away.
2. Flush the Line:
Use a vacuum or blow compressed air through the line to clear blockages.
3. Clean with Vinegar:
Pour a solution of equal parts water and vinegar into the drain line to dissolve any residual build-up. Allow it to sit for 30 minutes before flushing with clean water.
Ensuring that your drain line is regularly cleaned out can help prevent costly repairs and prolong your unit’s lifespan.
Final Checks and Regular Maintenance
Once your cleaning tasks are complete, inspect all components to ensure they are functioning properly. Check the thermostat, ensure the airflow is unrestricted, and confirm there are no unusual noises or odours.
Consistency is key when it comes to cleaning air conditioning units. To maximise the effects of your cleaning, we recommend doing so bi-annually whilst conducting aircon chemical cleans when necessary. If you encounter persistent issues, such as inadequate cooling or unusual sounds, consider consulting a professional technician who can assist in providing air conditioner repair parts or riskier services like aircon ledge cleaning.
DIY aircon cleaning is a cost-effective approach to improving the performance of your air conditioner. However, it should not be a means to ignore deeper-seated issues that may not be fixable without the right tools and expertise. This is where our trained technicians at Airple can help you out, with a wide range of aircon cleaning and repair services to tackle any issue.
To learn more about our services and how we can keep your air conditioners in excellent shape,
please contact us today.
Sign up for our newsletter
Get the best content on user insights, design, and product management delivered to your inbox every week.
Share This Article